As you know, Rust is a game with a very high competition and fighting spirit. Generally, new players can get bored of the game very quickly because they cannot keep up with the dynamics of the game. For this reason, many people are looking for ways to open a Rust server.
Opening a private server is of great importance to avoid the problems encountered in Rust's online games. In this way, you can train with your friends or alone in Rust and try to learn the game better.
In today's article, we will talk about how you can open your own dedicated Rust server. First you need to know that we have two methods. The first method is paid and requires you to purchase a dedicated Rust server. The second method is difficult and complex. Because you will need to host the Rust server folder on your own computer, it is possible to encounter performance problems.
Now if you're ready, let's get started and take a quick look at the details of opening a Rust server.
The Easiest Method: Buying Rust Dedicated Server Hosting
First of all, if it is not a paid method you are looking for, you can skip this method directly. If you do not want to deal with it and do not want to waste time, we definitely recommend this method to you. You can set up your Rust server by buying a private dedicated server with a few minutes of operation.
Why Should I Use Rust Dedicated Server Hosting?
As we mentioned at the beginning of our article, opening a Rust server is a very good way to learn the game and understand the basic mechanics. Now we will talk about why you will need to use a paid hosting server step by step.
- In the hard method, you will experience performance problems as the Rust server files will be hosted on your own computer. Especially playing Rust and opening a Rust server at the same time will consume your computer's resources incredibly.
- When you open a Rust dedicated server, the internet speed you use on your computer will be consumed quickly, just like your PC performance. So it is very possible that you will encounter ping problems while playing the game.
- Another problem is that if you are not using a private hosting, your friends will only be able to enter the server whenever you want. However, you will not encounter such problems with dedicated Rust server hosting services. Your server will be open 24/7.
Buying Private Rust Server Hosting
It is possible to buy a Rust dedicated server where you can host hundreds of people and never experience performance problems. All you need to do is to find a reliable hosting company.
If you want to have a server in Rust, you can find dozens of hosting companies with a simple Google search. The cost of starting a Rust server is between $10 and $30 per month.
As you can see, this method is the easiest and fastest way to host a Rust server. Now, if you want, let's switch to the free and difficult method.
However, we would like to warn you at this point. Because it can be really challenging, be careful to do all the steps one by one. If you're ready, let's start.
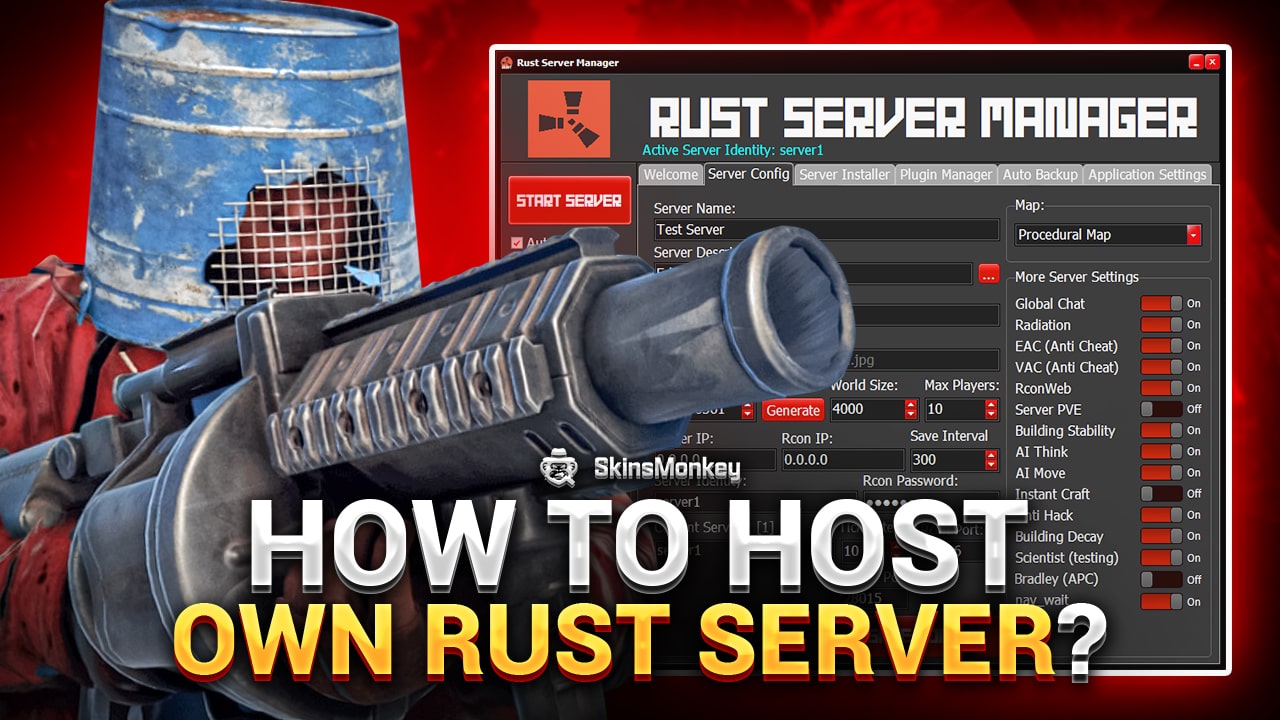
Advanced Method: Setting Up Your Own Rust Dedicated Server
Now we come to the difficult and complex method. If paying to open a Rust dedicated server is not for you, it is a soluton. We prepared a special instruction how to do it on your own computer. Let's look at the details.
Rust Server Requirements
First of all, you need to learn the system requirements necessary to open a Rust dedicated server. If the specifications of your system are not compatible with the values here, we strongly recommend that you do not host a server.
- 64-Bit Windows 7, 8, or 10
- 4GB Ram (8GB would be better)
- Minimum 6GB drive space
If you are going to set up the Rust server to the computer where you are playing the game, it is recommended to have 8GB of RAM or more. If you are going to set the Rust server folder to a different location other than the PC where you play the game, then 4GB Ram will be enough.
How to Install SteamCMD?
Now that we are ready to start, the first thing we need to learn is the SteamCMD installation. SteamCMD in short is a command prompt program for Steam. Follow the steps below for installation.
- You must download and install SteamCMD on Windows, Linux and MacOS. You can find the current versions from these links.
- After downloading the program, right click and click “Extract to steamcmd”. Then you will see that a new folder has been created on the desktop.

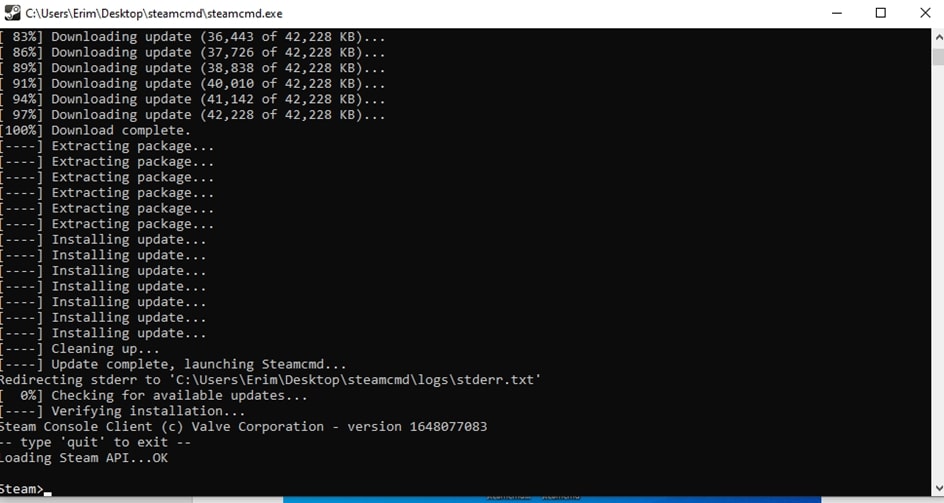
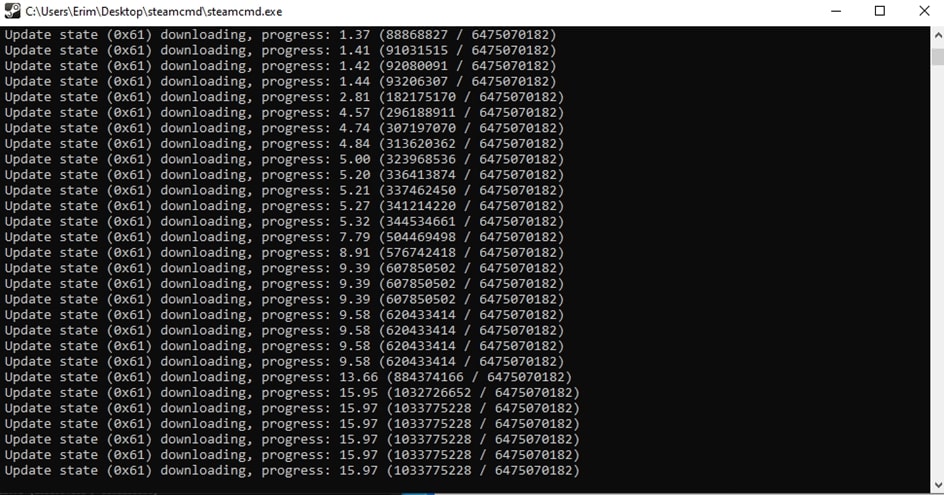
- Now go ahead and open the folder and run steamcmd. After clicking it, the command window will open and start doing a few updates. Be patient and wait for the update to finish.
- After all the update processes are completed, you need to login. For this, you must login using the “login anonymous” command.
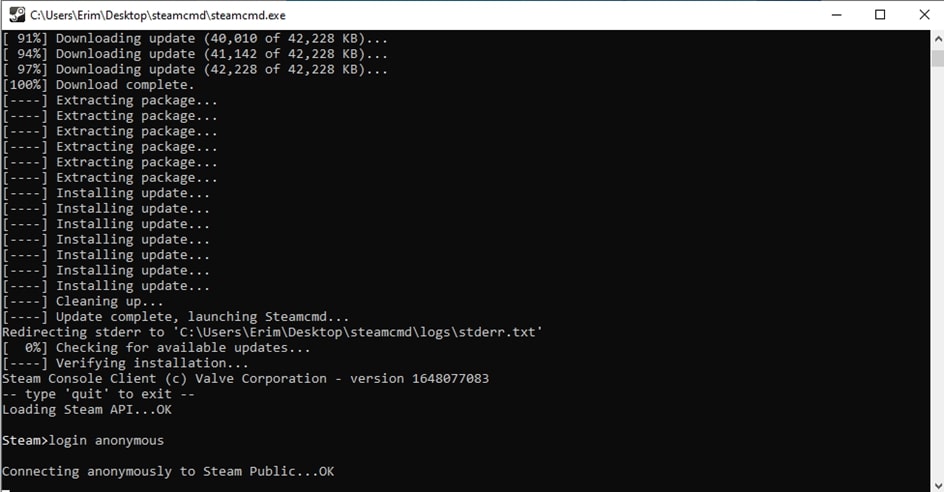
- Never close this command window when transitioning to a new phase. You will handle all your transactions here.
Rust Dedicated Server Setup
Here we will determine where to install Rust server files.
- You should come to the command window we left open and specify a target folder where you will run your server. The command you need to enter is: “force_install_dir C:\steamcmd\rust_server” . You can change it according to you.
- When the folder determination process is completed, start your server setup with the “app_update 258550 validate” command. At this point, the installation may take 5-10 minutes.
Server Update Settings
If you want to add new updates to Rust to the server you opened, you must enter some commands.
In contrast, to receive beta updates, you need to enter the “app_update 258550 validate” command.
Another beta update command is: “app_update 258550 -beta staging”
This is the command you need to enter your server to get the latest pre-release updates; “app_update 258550 -beta prerelease”
Rust Oxide and Mod Setup
You may need to mod to maximize the experience on your Rust server. If you want to install great addons on your server, you need to learn how to use Rust Oxide.
Rust Oxide is extremely simple to install. You can follow the steps below;
- Download the latest version of uMod here.
- Before starting the installation process, make sure your server is completely turned off.
- Extract the Oxide Zip file.
- After opening the Oxide zip file, you will see a folder named RustDedicated_Data. You should paste this into the folder where your Rust server is installed. Click on the overwrite folder as it will be from the same file.
- When the process is finished, click RustDedicated.exe and run it. It will take a while to install here. Test if your installation works by typing “Oxide.version”.
Rust Dedicated Server Run and Configuration
We have made all the adjustments and now you are ready to run your server. We won't have to deal with a lot of command lines in this section. You can run your server directly by following the steps below.
- First find where your Rust server folder is installed. It looks like the one in the picture below.
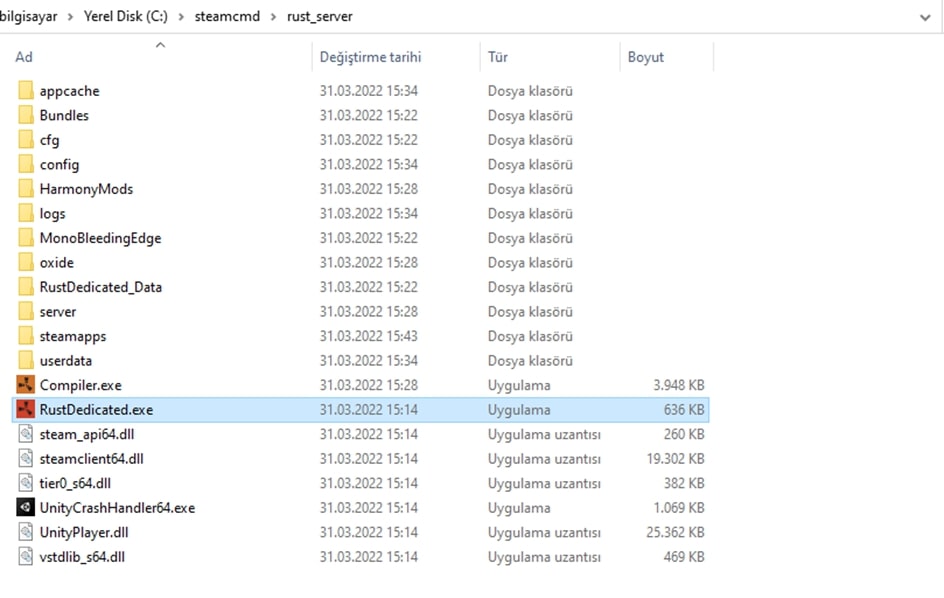
- If you want to start your server, you should click on the “RustDedicated.exe” text. Then the Rust client will open and a command window will open again. You have to wait for a while for the download to finish. After 3-5 minutes, you are ready to connect to the server.
- When you open the server, the procedural map, vanilla Rust, will be opened. If you want to modify it, we have already explained how to use Oxide Rust.
Batch Update Server Files
If you want to use your server for a long time, you need to know how to update batch files. Instead of dealing with it one by one, you can make your server more stable by applying the method we will explain below.
Open the folder where your server is installed.
Create a new text document by right-clicking on an empty area.
And add these command lines to the text document.
- “C:\steamcmd\\steamcmd.exe
- login anonymous
- force_install_dir “C:\steamcmd\rust_server”
- app_update 258550 validate
- quit
Then click “File” in the upper left part of the text and say “Save As”. Don't forget to change the name to “update.bat” when saving the file. Delete the text document after all operations are complete. That's all the transactions. You can click update.bat whenever you want to update.
Run Server Batch File
Now we come to edit the details of your server. Here we will make specific settings for your server.
First, create a new text document in your Rust Server folder. Then open the text document and type the following commands one by one.
@echo off
cls
:start
RustDedicated.exe
-nographics
-batchmode
-silent -crashes
+server.ip “(fill in your server ip)”
+server.identity “(fill in your server identity)”
+server.port 28015
+rcon.port 28016
+rcon.password “fill in a password”
-logfile “ServerLog.txt”
+rcon.web true
-logfile “output.txt”
goto start
Important Note: Do not enclose the information in parentheses when filling in the information according to you.

If you have entered the commands and you are done, go to “File” and click “Save as” to save the file as Run.bat. Now that the save process is finished, you can remove the old text document. Now what you have to do is click Run.bat and run the batch file .
Batch File Commands for Rust Dedicated Servers
In a previous topic, we talked about how to create a batch script file. There were multiple commands in the batch script file we created. It is important that you know what these commands mean. Thus, read this guide until the end to know the meanings of individual commands.
Echo off: This command instructs the server not to display all batch instructions that have been executed.
:start: The starting point of the server.
Goto start: This is the command that tells the server to restart after shutting down.
-batchmode: It will open Unity in non-GUI mode.
+server.port 28015: Runs Rust's default port.
+server.seed: This is a command that works with the Y Minecraft logic. It determines how the Procedural Map will be set up. The value range of Y is 0-2147483647.
+server.level Procedural Map: Allows you to specify the map of the server. For example, maps such as SavasIsland, Barren and HapisIsland can be used.
+server.worldsize Y: You can specify the size of the World by entering a number between 1000 and 6000.
+server.maxplayers Y: You can choose how many people can enter for the Rust dedicated server you have opened.
+server.hostname “Name”: In the Name field, you can write what you want to appear in the server list.
+server.description “Description”: You can show the description of your server in the server list.
+server.url “https:// website.com”: If your Rust Server has a website, you can write it in the blank.
+server.headerimage “Image link”: It is the command that you can change the background image of the server's connection point in the server list. Just paste the image link you uploaded into the blank.
+rcon.port 28016: Specifies the Rcon port for Client Connection.
+rcon.password “123456”: You can use encryption to access Rcon. When you create a password, you do not need to use special characters.
How Can I Connect to Dedicated Rust Server?
If you have installed your server on the computer where you are playing the game, what we will do is a little easy. If you are going to connect from a separate PC, you need to follow the steps below.
Connecting From Your Own Computer
- Launch Rust from the desktop or from your Steam library.
- After the Game Homepage opens, press F1 to open the console.
- Type “client.connect localhost:28015” in the Console section and wait to connect to the server.
Connecting to Your Own Server from Another Computer
When connecting from another computer, you need to find the IP address of the server. However, remember that the internet connection of the computer where the server is installed is important. If you are not connected to that internet, you will not be able to login to the server.
- If you want to connect from outside the network, you need to do port forwarding.
- When your computer is on you need to press the Windows + R key on the keyboard. Type “cmd” in the box that opens and press Enter and click OK.
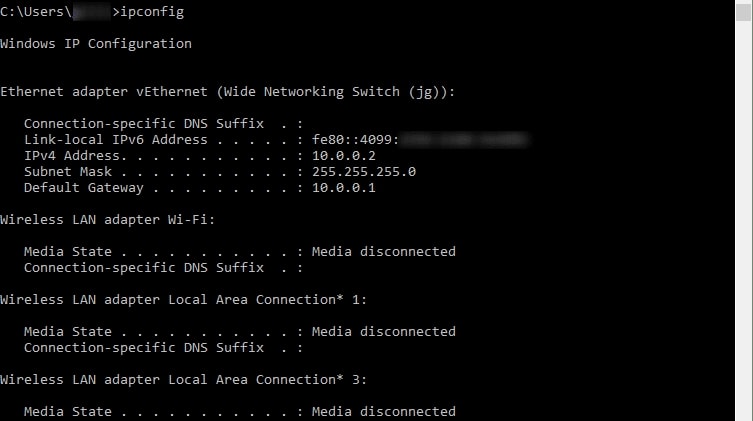
- Type “ipconfig” on the command page that opens and press Enter.
- You need to find the IPv4 address. Copy it with CTRL+C when you find it.
- Then run Rust again and press F1 on the main page to open the console. Paste the address you copied here (client.connect localhost:28015) instead of localhost and log in. That's it!
Final Words
If you have read our articles so far, you must have seen how difficult it is to open a free Rust server. Opening a server with the limited resources your computer can provide can cause some problems. On the other hand, using Rust dedicated server hosting is fast and easy.
As a result, we summarize the pros and cons of the two methods one last time. In this way, you can make your own decision as you wish.
Dedicated Rust Servers: Results
Open a dedicated Vanilla Rust server when you plan to play with a few friends. However, you will still likely experience performance and internet problems.
Pros
- You can use it as you want. It gives you complete freedom.
You can customize your own server as you wish. You can install dozens of mods and create your dream Rust server.
Cons
- There will be no cheat protection.
- It consumes your RAM, CPU and internet bandwidth very fast.
- Setting up and managing a Rust server requires a lot of knowledge.
- Ideal for 2-3 players.
Rust Servers Hosting
To use Rust servers hosting, you need to pay regularly every month. We recommend to rent a remote computer. It allows you to use it as you wish.
Pros
- You will not experience drops in your internet connection and PC performance. Your gaming comfort will increase.
- It is much faster. Don't bother with installation and management.
- Thanks to the support team, you do not have to worry about errors for hours.
Cons
- You have to make regular monthly payments. It has an average fee of $10 to $30.
- You cannot make the mode and customization you want. There are restrictions.
- They may prevent you from accessing server files directly.
FAQ
Can you host your own Rust server?
You can set up your Rust server directly on the computer you use at home. Keep in mind that everyone logging into the server must have the same internet connection as you.
How much RAM does a Rust server need?
If you have installed your Rust servers on your own computer, there are two applicable options. First of all, if you installed it on your own computer, 8GB of RAM will be enough for you. If you plan to install it on another computer, 4GB of RAM can be more than enough for you.
Do you need a good PC to host a Rust server?
Definitely yes. If you install a Rust server on a high-performance computer, you can invite more people to your server. The server will use the CPU, RAM and internet connection a lot. In order to avoid this problem you need to have a fast internet connection.
Meta: We explain step by step how to host your own Rust server. If you are curious, you can have information by looking at the details of our article.
A true gaming enthusiast, especially Counter-Strike: Global Offensive (CS2) and Rust. At SkinsMonkey, he is involved in creating game guides based on his own experience.